Adobe Premiere Pro is one of the most popular suites for editing videos, and it can be extremely difficult to understand how to use it with all of the overwhelming sections you can click on. It also doesn’t help that most of the professionals in the entertainment industry use this application, which means it’s geared mainly towards those in Hollywood.
However, if you’d like to edit just like the pros, here are some tips to help on your filming journey.

- Key-frame your effects
Key-framing effects allow your video to have movable parts to it. This could be a zoom effect, a screen shake or even a transition to the next scene.
To achieve this, go to the Effect Controls panel and click on the clock symbol next to the effect to toggle animation for that specific effect. Then you can use the controls/timeline on the right side to add and jump between the keyframes that you added. Keyframing gives you the ability to have exact control over the effects you’ve chosen.
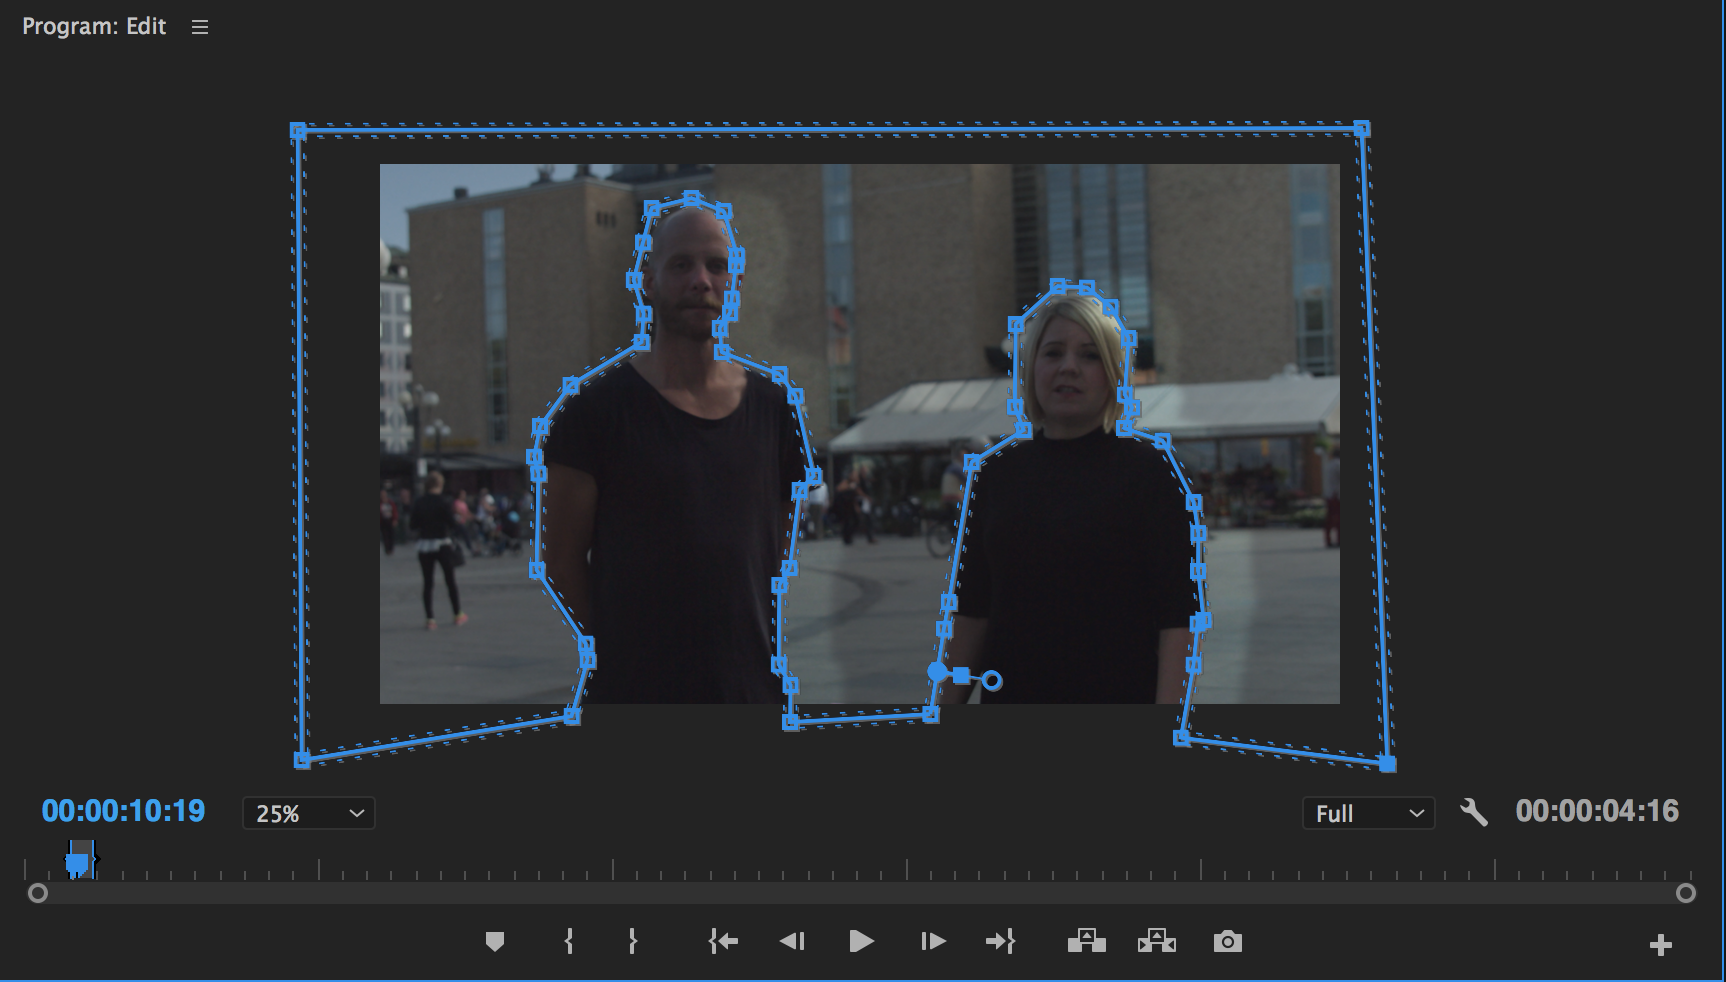
2. Masking
To apply effects to a specific area within a clip, such as brightening the negative space or subject(s), you can use the masking effect. First, duplicate the clip you want onto a layer above. Next, in the Effect Controls panel, under Opacity, click the pen tool draw around the area you’d like to mask
Any effect you add to this clip will only apply to the area within the mask. If you’d like to track moving subjects, Premiere can automatically track the motion and adjust the mask for you. Simply press the play icon next to Mask Path. To blend the layers together to make them appear smoother, you can use the feather tool.

3. Adjustment Layers
If you want to apply one effect to a series of clips, then adjustment layers are absolutely perfect for this. This allows you to not have to select clips individually and edit. The direct clip selection process can be especially annoying with color-grading as well.
To add an adjustment layer, in the Project browser, click New Item > Adjustment Layer. The New Item icon looks like a double folder. Then the adjustment layer will appear in your bin. Drag it onto the timeline, above all the clips you want it to affect, then you can apply the effects you want to it. All the clips below it will be adjusted to the effects you select.

